Gradle flaky tests
- The Tuist Gradle plugin installed and configured
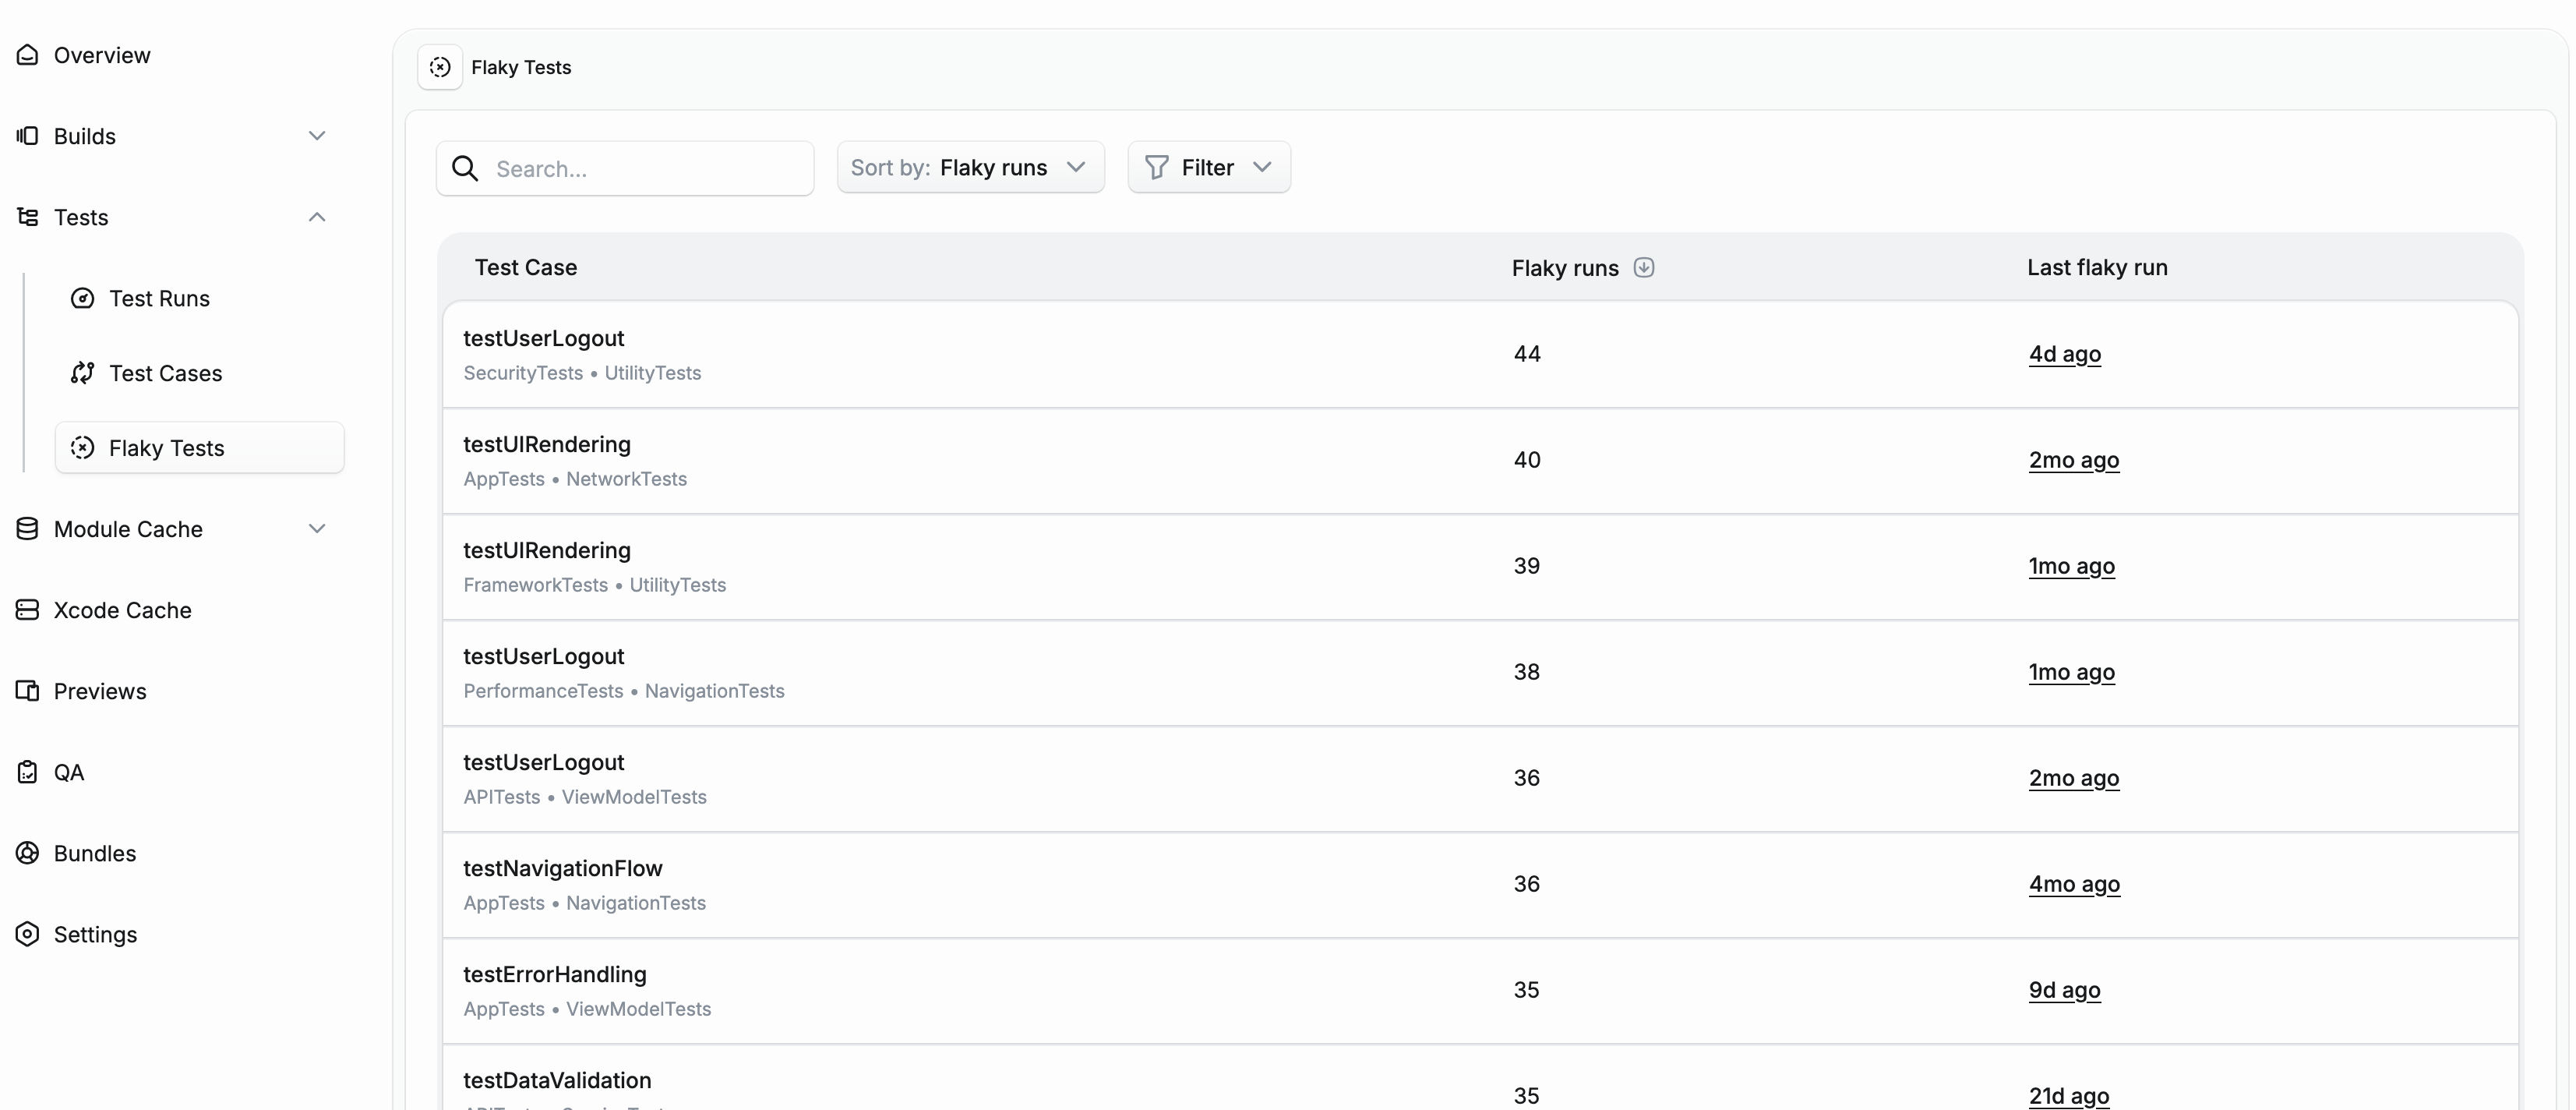
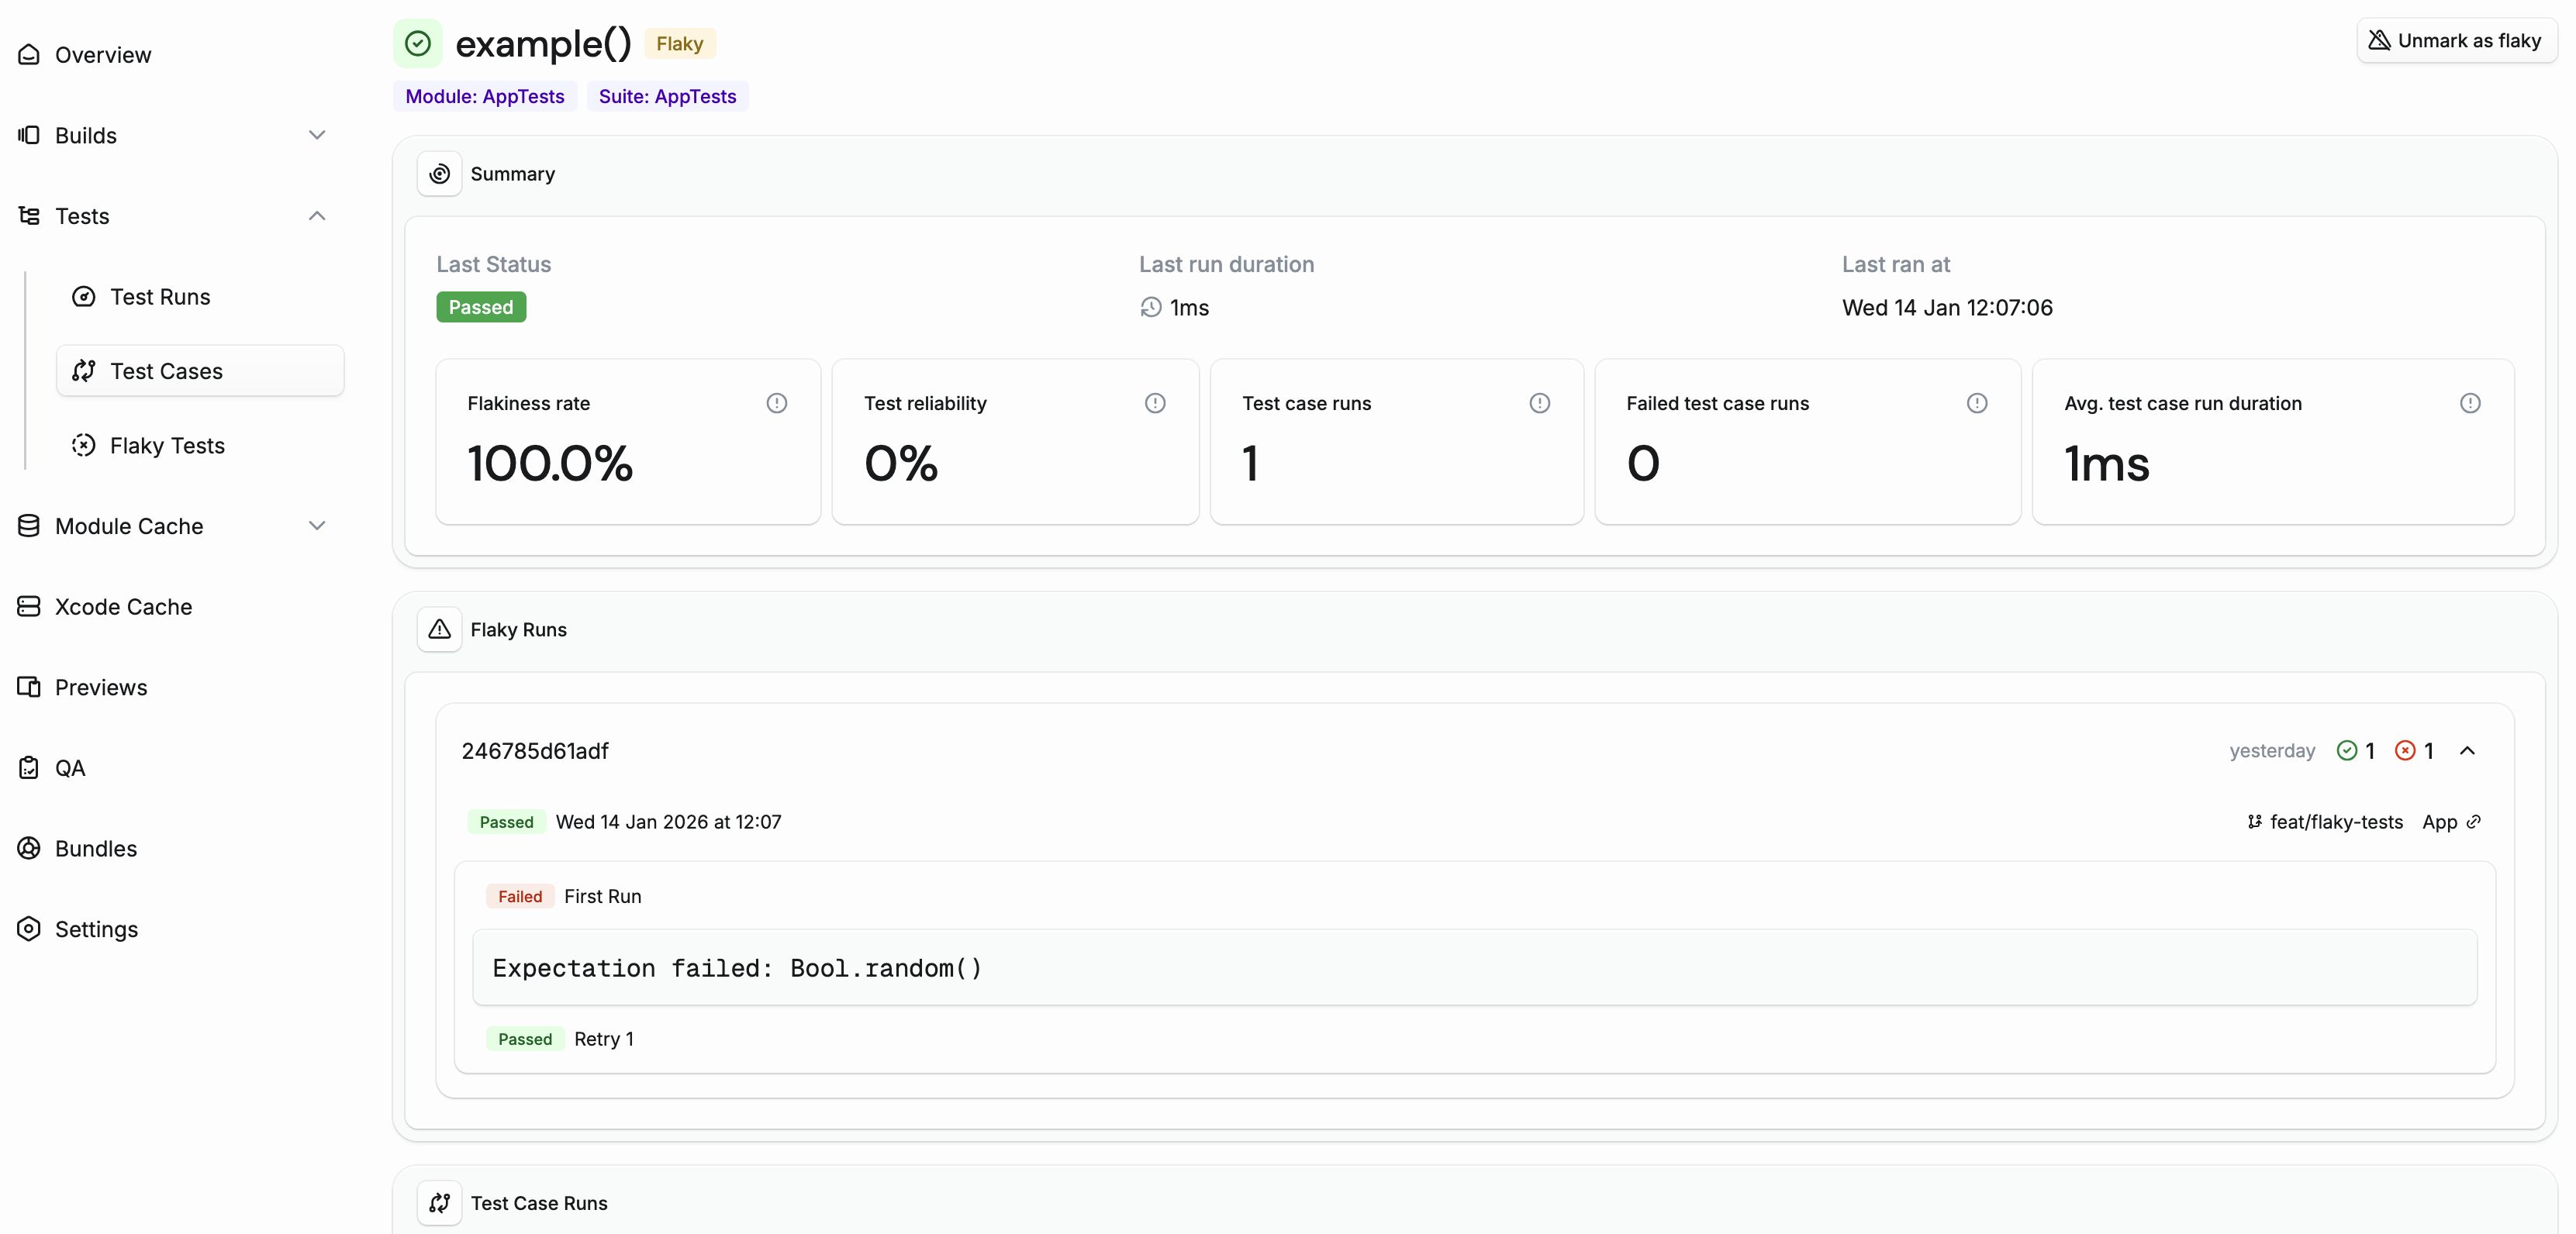
Flaky tests are tests that produce different results (pass or fail) when run multiple times with the same code. They erode trust in your test suite and waste developer time investigating false failures. Tuist automatically detects flaky tests and helps you track them over time.
How flaky detection works#
Tuist detects flaky tests in two ways:
Test retries#
When you run tests with retry functionality, Tuist analyzes the results of each attempt. If a test fails on some attempts but passes on others, it's marked as flaky.
You can use the Test Retry plugin or a similar mechanism to re-run failed tests. Tuist will detect tests that pass on some attempts but fail on others.
Add the plugin to your build.gradle.kts:
plugins {
    id("org.gradle.test-retry") version "1.6.2"
}

tasks.test {
    retry {
        maxRetries = 3
        maxFailures = 5
        failOnPassedAfterRetry = false
    }
}
Cross-run detection#
Even without test retries, Tuist can detect flaky tests by comparing results across different CI runs on the same commit and the same Gradle project. If a test passes in one CI run but fails in another run for the same commit and project, both runs are marked as flaky.
The Gradle project is part of the comparison key because the same test can behave deterministically differently across projects — for example, a shared test class compiled with different dependencies or run on a different module fixture. Two runs of the same commit on different Gradle projects are treated as separate execution variants and won't flag each other as flaky.
This is particularly useful for catching flaky tests that don't fail consistently enough to be caught by retries, but still cause intermittent CI failures.
Managing flaky tests#
Automatic clearing#
Detection and clearing run through an automation alert on the project. Every project gets a default "Flaky test detection" automation whose trigger marks a test as flaky and whose recovery clears the flag once the test has gone the configured recovery window (default 14 days) without re-triggering. Edit it under Settings → Automations to change the recovery window, swap the recovery actions (e.g. also un-quarantine), or disable recovery entirely so tests stay marked flaky until you clear them by hand.
Manual management#
You can also manually mark or unmark tests as flaky from the test case detail page. This is useful when:
- You want to acknowledge a known flaky test while working on a fix
- A test was incorrectly flagged due to infrastructure issues
Quarantining flaky tests#
Quarantining isolates a flaky test so it doesn't block CI while you fix it. By default it's a manual action — you quarantine, un-quarantine, and switch modes from the test case detail page in the dashboard — but you can also wire it into an automation alert under Settings → Automations so a test is automatically muted (or skipped) when it crosses a flakiness threshold, and un-quarantined when it recovers. Every transition, manual or automated, is recorded on the test case's audit log.
A quarantined test is in one of two modes:
- Muted: the test still runs, but the plugin sets
ignoreFailures = trueand only re-fails the build on non-quarantined failures. Failures still feed the flaky-tests detector, so you can keep watching the test without breaking the build. Pick this for a test you're actively investigating. - Skipped: the plugin filters the test out via Gradle's
excludeTestsMatching, so it never starts. It produces no new results and drops off the flaky-tests dashboard until you re-enable it. Pick this when the test is broken, slow, or so persistently flaky that running it is just wasted CI minutes.
Why quarantined tests can appear as passing#
- Muted tests still execute. A muted test that fails is recorded as failed on the test case run and flagged as flaky — the per-test status is not rewritten. What gets overridden is the overall test run: if every failing test case in the run is muted, the run as a whole is reported as passed, so muted failures don't break CI.
- Skipped tests don't run at all, so the dashboard keeps showing the status from the test's last actual execution — that snapshot can be weeks old.
Enabling quarantine#
Quarantine is automatically enabled on CI (when the CI environment variable is set) and disabled for local builds. The plugin fetches the list of quarantined tests from the Tuist server before each test task; muted tests run normally and have their failures masked, skipped tests are filtered out.
You can explicitly control this in your settings.gradle.kts:
tuist {
    testQuarantine {
        enabled = true  // or false to disable
    }
}
When enabled is not set, it defaults to auto-detection: enabled on CI, disabled locally.
Slack notifications#
Get notified instantly when a test becomes flaky by setting up flaky test alerts in your Slack integration.
Querying flaky and quarantined state#
CLI#
The tuist test case command tree exposes everything Tuist tracks about a test case:
tuist test case list --flaky                       # only flaky test cases
tuist test case list --quarantined                 # only muted or skipped test cases
tuist test case show <test_case_id>                # detail: flakiness rate, last status, run counts
tuist test case events <test_case_id>              # audit log: marked_flaky, muted, skipped, ...
tuist test case run list <test_case_id>            # run history with status and duration
tuist test case run show <test_case_run_id>        # single run, including failure breakdown
All of these accept --json for scripting.
REST API#
The same data is available over HTTP — see the Test Cases endpoints in the API reference for the full list of routes, filters, and response fields. State changes (mark/unmark flaky, mute, skip) currently happen from the dashboard UI, not via the public REST API.