As codebases grow, organizing modules becomes increasingly complex. Teams typically structure their code using familiar patterns: grouping modules by architectural layers (UI, business logic, data), by features (authentication, payments, settings), by team ownership, or by platform. These organizational patterns help maintain clarity as projects scale from a handful of modules to dozens or hundreds.
Traditionally, teams have used Xcode's building blocks like projects, targets, and schemes to model these organizational patterns. A project might contain all networking-related modules, another might house the UI layer, and so on. This approach works, but it has a fundamental limitation: it forces you to choose a single organizational dimension. If you organize by layer, you lose visibility into features. If you organize by feature, you obscure the architectural structure.
The reality is that organizational needs are often orthogonal to each other. The networking layer crosses multiple features. A single feature might span multiple architectural layers. A team might own modules across different parts of the system. Xcode's project-based organization cannot easily represent these intersecting concerns.
Enter metadata tags
This is precisely the problem that metadata tags solve, and it is one of Tuist's most powerful yet underutilized features. Metadata tags are simple string labels that you attach to targets in your project manifests. They allow you to organize modules across multiple dimensions simultaneously without restructuring your codebase or creating complex Xcode project hierarchies.
Here is a practical example:
import ProjectDescription

let project = Project(
    name: "MyApp",
    targets: [
        .target(
            name: "NetworkKit",
            destinations: .iOS,
            product: .framework,
            bundleId: "com.example.networkkit",
            sources: ["Sources/**"],
            metadata: .metadata(tags: [
                "layer:networking",
                "team:platform",
                "feature:core"
            ])
        ),
        .target(
            name: "PaymentUI",
            destinations: .iOS,
            product: .framework,
            bundleId: "com.example.paymentui",
            sources: ["Sources/**"],
            metadata: .metadata(tags: [
                "layer:ui",
                "team:commerce",
                "feature:payment"
            ])
        )
    ]
)
Notice how each target can have multiple tags representing different organizational dimensions. NetworkKit is simultaneously part of the networking layer, owned by the platform team, and considered core functionality. This multi-dimensional organization is impossible to represent with traditional Xcode project structures.
Tag naming conventions
While you can use any string as a tag, following a consistent naming convention makes your tags more maintainable and discoverable. We recommend using prefixes to namespace your tags by dimension:
// Organize by architectural layer
metadata: .metadata(tags: ["layer:ui", "layer:business", "layer:data"])

// Organize by team ownership
metadata: .metadata(tags: ["team:platform", "team:commerce", "team:identity"])

// Organize by feature area
metadata: .metadata(tags: ["feature:authentication", "feature:payment", "feature:settings"])

// Organize by platform
metadata: .metadata(tags: ["platform:ios", "platform:macos", "platform:watchos"])
You can combine multiple dimensions on a single target, creating a rich metadata system that reflects the true complexity of your codebase without adding structural overhead.
Focusing your development
Once you have tagged your targets, you can use these tags to focus your development workflow. Here's a quick walkthrough showing how this works in practice:
Want to work exclusively on the networking layer? Simply generate a focused workspace:
tuist generate tag:layer:networking
Tuist will generate a workspace that includes all targets tagged with layer:networking, plus their dependencies. This gives you a smaller, more manageable workspace that contains only what you need for your current work.
You can also combine tags with target names:
# Focus on the Payment feature
tuist generate tag:feature:payment
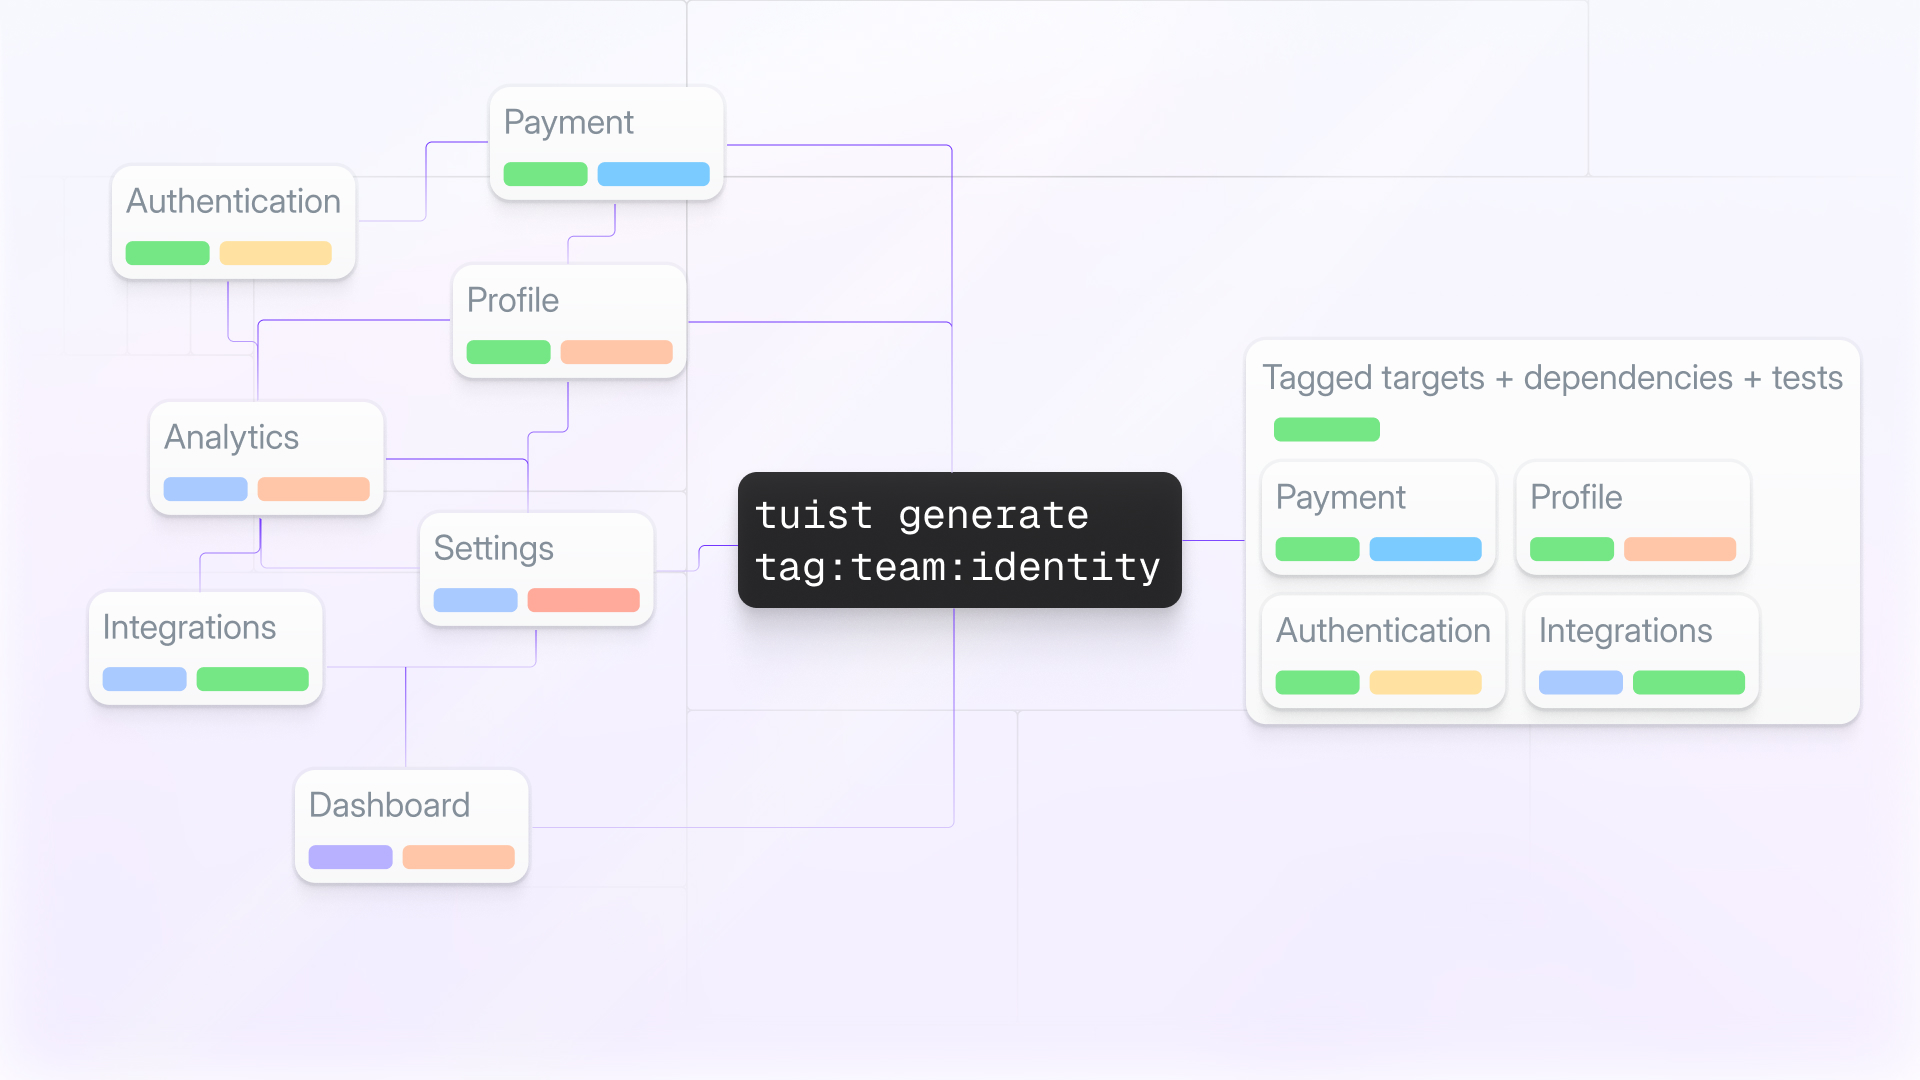
# Focus on all commerce team modules
tuist generate tag:team:commerce
# Focus on a specific target by name
tuist generate PaymentUI
When you focus on targets, Tuist automatically includes:
- All targets matching your query
- All dependencies of those targets
- Test targets for the focused targets
Everything else is excluded, giving you faster project loading, quicker indexing, and more focused development.
The real power: combining tags with module caching
This is where metadata tags truly shine. Tuist's module caching can replace targets with their precompiled .xcframework binaries, dramatically speeding up build times. When you combine this with metadata tags, you get fine-grained control over which parts of your codebase remain as editable source and which are replaced with binaries.
Here is a concrete example. Imagine you are working on the networking layer of your app. You want to iterate quickly on networking code, but you do not need to touch any UI or business logic. With metadata tags and module caching, you can do this:
# Warm the cache with all compiled binaries
tuist cache

# Generate a project focused on networking, keeping those targets as sources
tuist generate tag:layer:networking
Tuist will generate a workspace where:
- All targets tagged with
layer:networkingremain as editable source code - All dependencies of those targets that are not tagged with
layer:networkingare replaced with cached binaries - You get full compile-time feedback on your networking changes
- But you avoid recompiling unrelated parts of the codebase
This workflow is transformative for large codebases. A one-line change in a low-level module traditionally forces a full rebuild. With focused caching through metadata tags, you recompile only what matters for your current work.
Let's look at a more complex scenario. Suppose you are on the commerce team working on payment features. Your workspace might look like this:
# Focus on commerce team modules, everything else is cached
tuist generate tag:team:commerce
Now only your team's modules compile from source. All platform infrastructure, other features, and shared utilities? Cached binaries. You get instant feedback on your team's code without waiting for the entire codebase to compile.
Or perhaps you want to work across features but only at the UI layer:
# Keep all UI layer modules as sources
tuist generate tag:layer:ui
Now you can freely modify UI components across different features, while the business logic and data layers are served from cache.
Practical examples
Let's walk through some real-world scenarios to illustrate how teams can leverage metadata tags.
Scenario 1: Feature team development
Your app has multiple features: authentication, payments, settings, and analytics. Each is owned by a different team. You tag your modules accordingly:
// Authentication modules
.target(
    name: "AuthenticationKit",
    metadata: .metadata(tags: ["feature:auth", "team:identity", "layer:business"])
)
.target(
    name: "AuthenticationUI",
    metadata: .metadata(tags: ["feature:auth", "team:identity", "layer:ui"])
)

// Payment modules
.target(
    name: "PaymentKit",
    metadata: .metadata(tags: ["feature:payment", "team:commerce", "layer:business"])
)
.target(
    name: "PaymentUI",
    metadata: .metadata(tags: ["feature:payment", "team:commerce", "layer:ui"])
)
A developer on the commerce team runs:
tuist generate tag:team:commerce
They get a workspace with PaymentKit and PaymentUI as sources, everything else cached. The workspace loads faster, Xcode indexes less code, and clean builds are dramatically faster because most of the app is precompiled.
Scenario 2: Architectural layer refactoring
Your team is refactoring the data layer to use a new database framework. You want to work on data layer modules without touching business logic or UI:
tuist generate tag:layer:data
All data layer modules remain as sources. Business logic and UI layers are cached binaries. You can iterate rapidly on your database code, running tests frequently without waiting for unrelated code to compile.
Scenario 3: Platform infrastructure work
You are working on core infrastructure that many features depend on: networking, logging, analytics. These modules are tagged as platform team ownership:
tuist generate tag:team:platform
You get all platform infrastructure as sources, allowing you to make changes across multiple infrastructure modules simultaneously, while feature code remains cached.
Scenario 4: Multi-platform development
Your codebase supports iOS, macOS, and watchOS. You are working exclusively on the watchOS app:
tuist generate tag:platform:watchos
Only watchOS-specific code and its direct dependencies remain as sources. iOS and macOS modules? Cached. You avoid the cognitive load and compile time of irrelevant platforms.
Standardizing tags with helpers
As your tagging strategy matures, you will want consistency across your project manifests. Project description helpers provide a perfect way to standardize tag application:
// Tuist/ProjectDescriptionHelpers/Target+Templates.swift
import ProjectDescription

extension Target {
    public static func feature(
        name: String,
        team: String,
        layer: String,
        dependencies: [TargetDependency] = []
    ) -> Target {
        .target(
            name: name,
            destinations: .iOS,
            product: .framework,
            bundleId: "com.example.\(name.lowercased())",
            sources: ["Sources/**"],
            dependencies: dependencies,
            metadata: .metadata(tags: [
                "feature:\(name.lowercased())",
                "team:\(team.lowercased())",
                "layer:\(layer.lowercased())"
            ])
        )
    }
}
Now in your manifests, you can use this helper to ensure consistent tagging:
import ProjectDescription
import ProjectDescriptionHelpers

let project = Project(
    name: "Features",
    targets: [
        .feature(name: "Authentication", team: "Identity", layer: "Business"),
        .feature(name: "Payment", team: "Commerce", layer: "Business"),
        .feature(name: "Settings", team: "Platform", layer: "UI")
    ]
)
This approach ensures every module gets tagged consistently, making your organization system reliable and maintainable as your team grows.
Organizing tags with enums
For even better maintainability and compile-time safety, you can define your tags as constants organized in enum namespaces. This prevents typos and makes it easy to discover available tags:
// Tuist/ProjectDescriptionHelpers/Tags.swift
import ProjectDescription

public enum Tags {
    // Using enums as namespaces for string constants
    public enum Domain {
        public static let authentication = "domain:authentication"
        public static let payment = "domain:payment"
        public static let settings = "domain:settings"
        public static let networking = "domain:networking"
    }

    public enum Layer {
        public static let ui = "layer:ui"
        public static let business = "layer:business"
        public static let data = "layer:data"
    }

    public enum Team {
        public static let identity = "team:identity"
        public static let commerce = "team:commerce"
        public static let platform = "team:platform"
    }

    public enum Platform {
        public static let ios = "platform:ios"
        public static let macos = "platform:macos"
        public static let watchos = "platform:watchos"
    }
}
Note that these are enums used as namespaces containing static string properties, not enum cases. When you access Tags.Domain.authentication, you get the string "domain:authentication" directly.
Then use these constants in your target definitions:
// Tuist/ProjectDescriptionHelpers/Target+Templates.swift
import ProjectDescription

extension Target {
    public static func feature(
        name: String,
        domain: String,
        team: String,
        layer: String,
        dependencies: [TargetDependency] = []
    ) -> Target {
        .target(
            name: name,
            destinations: .iOS,
            product: .framework,
            bundleId: "com.example.\(name.lowercased())",
            sources: ["Sources/**"],
            dependencies: dependencies,
            metadata: .metadata(tags: [domain, team, layer])
        )
    }
}
And in your manifests:
import ProjectDescription
import ProjectDescriptionHelpers

let project = Project(
    name: "Features",
    targets: [
        .feature(
            name: "AuthenticationKit",
            domain: Tags.Domain.authentication,
            team: Tags.Team.identity,
            layer: Tags.Layer.business
        ),
        .feature(
            name: "PaymentUI",
            domain: Tags.Domain.payment,
            team: Tags.Team.commerce,
            layer: Tags.Layer.ui
        )
    ]
)
This approach provides:
- Autocomplete - Your IDE suggests available tags as you type
- Refactoring safety - Renaming a tag updates all usages
- No typos - The compiler catches invalid tag references
- Discoverability - New team members can explore available tags through IDE completion
You can extend this pattern further with methods that return computed tags:
public enum Tags {
    public enum Feature {
        public static func name(_ value: String) -> String {
            "feature:\(value.lowercased())"
        }
    }
}

// Usage
metadata: .metadata(tags: [Tags.Feature.name("Authentication")])
This gives you the flexibility to generate tags dynamically while still maintaining organization and type safety.
Best practices
Based on our experience helping teams adopt metadata tags, here are some recommendations:
Start simple. Begin with a single tagging dimension that solves your most pressing organizational problem. If your biggest pain point is architectural clarity, start with layer tags. If it is team boundaries, start with team tags. You can always add more dimensions later.
Be consistent. Use the same naming conventions across all manifests. Document your tagging strategy in your project's README so everyone understands the system.
Use helpers. Leverage project description helpers to enforce consistency. This prevents typos and ensures new modules get tagged correctly from the start.
Iterate based on workflow. Pay attention to which tags you actually use for focusing. If you rarely use certain tags, consider whether they are adding value or just noise.
Review periodically. As your project evolves, review your tagging strategy. Teams reorganize, features mature, and architectural patterns change. Keep your tags current.
Why this matters
Metadata tags might seem like a simple feature, but they unlock a fundamentally different way of working with large codebases. Instead of fighting against monolithic builds or creating complex Xcode workspace hierarchies, you can organize your code conceptually and generate focused workspaces on demand.
When combined with module caching, this becomes even more powerful. You get the benefits of modularization, fast compilation times, and the flexibility to work on any part of your codebase without waiting for irrelevant modules to compile.
If you have been using Tuist but have not yet explored metadata tags, we strongly encourage you to try them. They represent a different paradigm for organizing and working with Xcode projects, one that scales naturally as your project grows.
To learn more about metadata tags, check out our documentation. You can also explore how tags integrate with module caching to supercharge your development workflow.
We would love to hear how you are using metadata tags. Share your experiences in our community forum, Slack, or on Mastodon.