
You've built a portable CLI in a programming language like Zig, Rust, Go, or Swift. Through continuous integration you build binaries for the various supported platforms and architectures, and through a bash script or any other installation method, you make it easier for users to install it. However, after users install it and try to open it, they get an error: "'your-cli' can't be opened because Apple cannot check it for malicious software.".
This error occurs because macOS has a security feature called Gatekeeper, which is designed to ensure that only trusted software runs on the system. When you try to open your CLI, Gatekeeper checks if the software has been signed and notarized by Apple. If it hasn't, macOS will block it from running, displaying the error message mentioned above.
Homebrew, a popular package manager for macOS, attempts to apply an ad-hoc signature to the file using
codesign --sign -to prevent this error from happening. However, we recommend you sign it with your own identity to ensure that the software is from a verified source.
All the code examples in this blog post are available in this gist.
What is code signing?
Code signing is the process of digitally signing executables and scripts to confirm the software author and guarantee that the code has not been altered or corrupted since it was signed. This is done using a cryptographic hash to validate the integrity and authenticity of the software. By signing your CLI, you provide a level of trust to the users and the operating system that the software is from a verified source and has not been tampered with.
What is notarization?
Notarization is an additional layer of security provided by Apple. After signing your software, you can submit it to Apple for notarization. Apple will scan your software for malicious content and, if it passes the checks, will issue a notarization ticket. This ticket is then attached to your software, indicating that it has been verified by Apple and is safe to run on macOS. Notarization helps to reassure users that the software is trustworthy and complies with Apple's security standards.
By signing and notarizing your CLI, you ensure that it can be opened and run on macOS without triggering security warnings, providing a smoother and more secure experience for your users.
Prerequisites
To sign and notarize your CLI, you'll need:
- A developer account, which at the time of this writing costs $99 per year.
- An app-specific password for your Apple ID.
- A macOS environment with the Xcode developer tools installed. Alternatively, you can use apple-codesign, which is a Rust crate that provides a CLI for signing and notarizing Apple artifcats from Linux environments.
Create a 'Developer ID Application' certificate
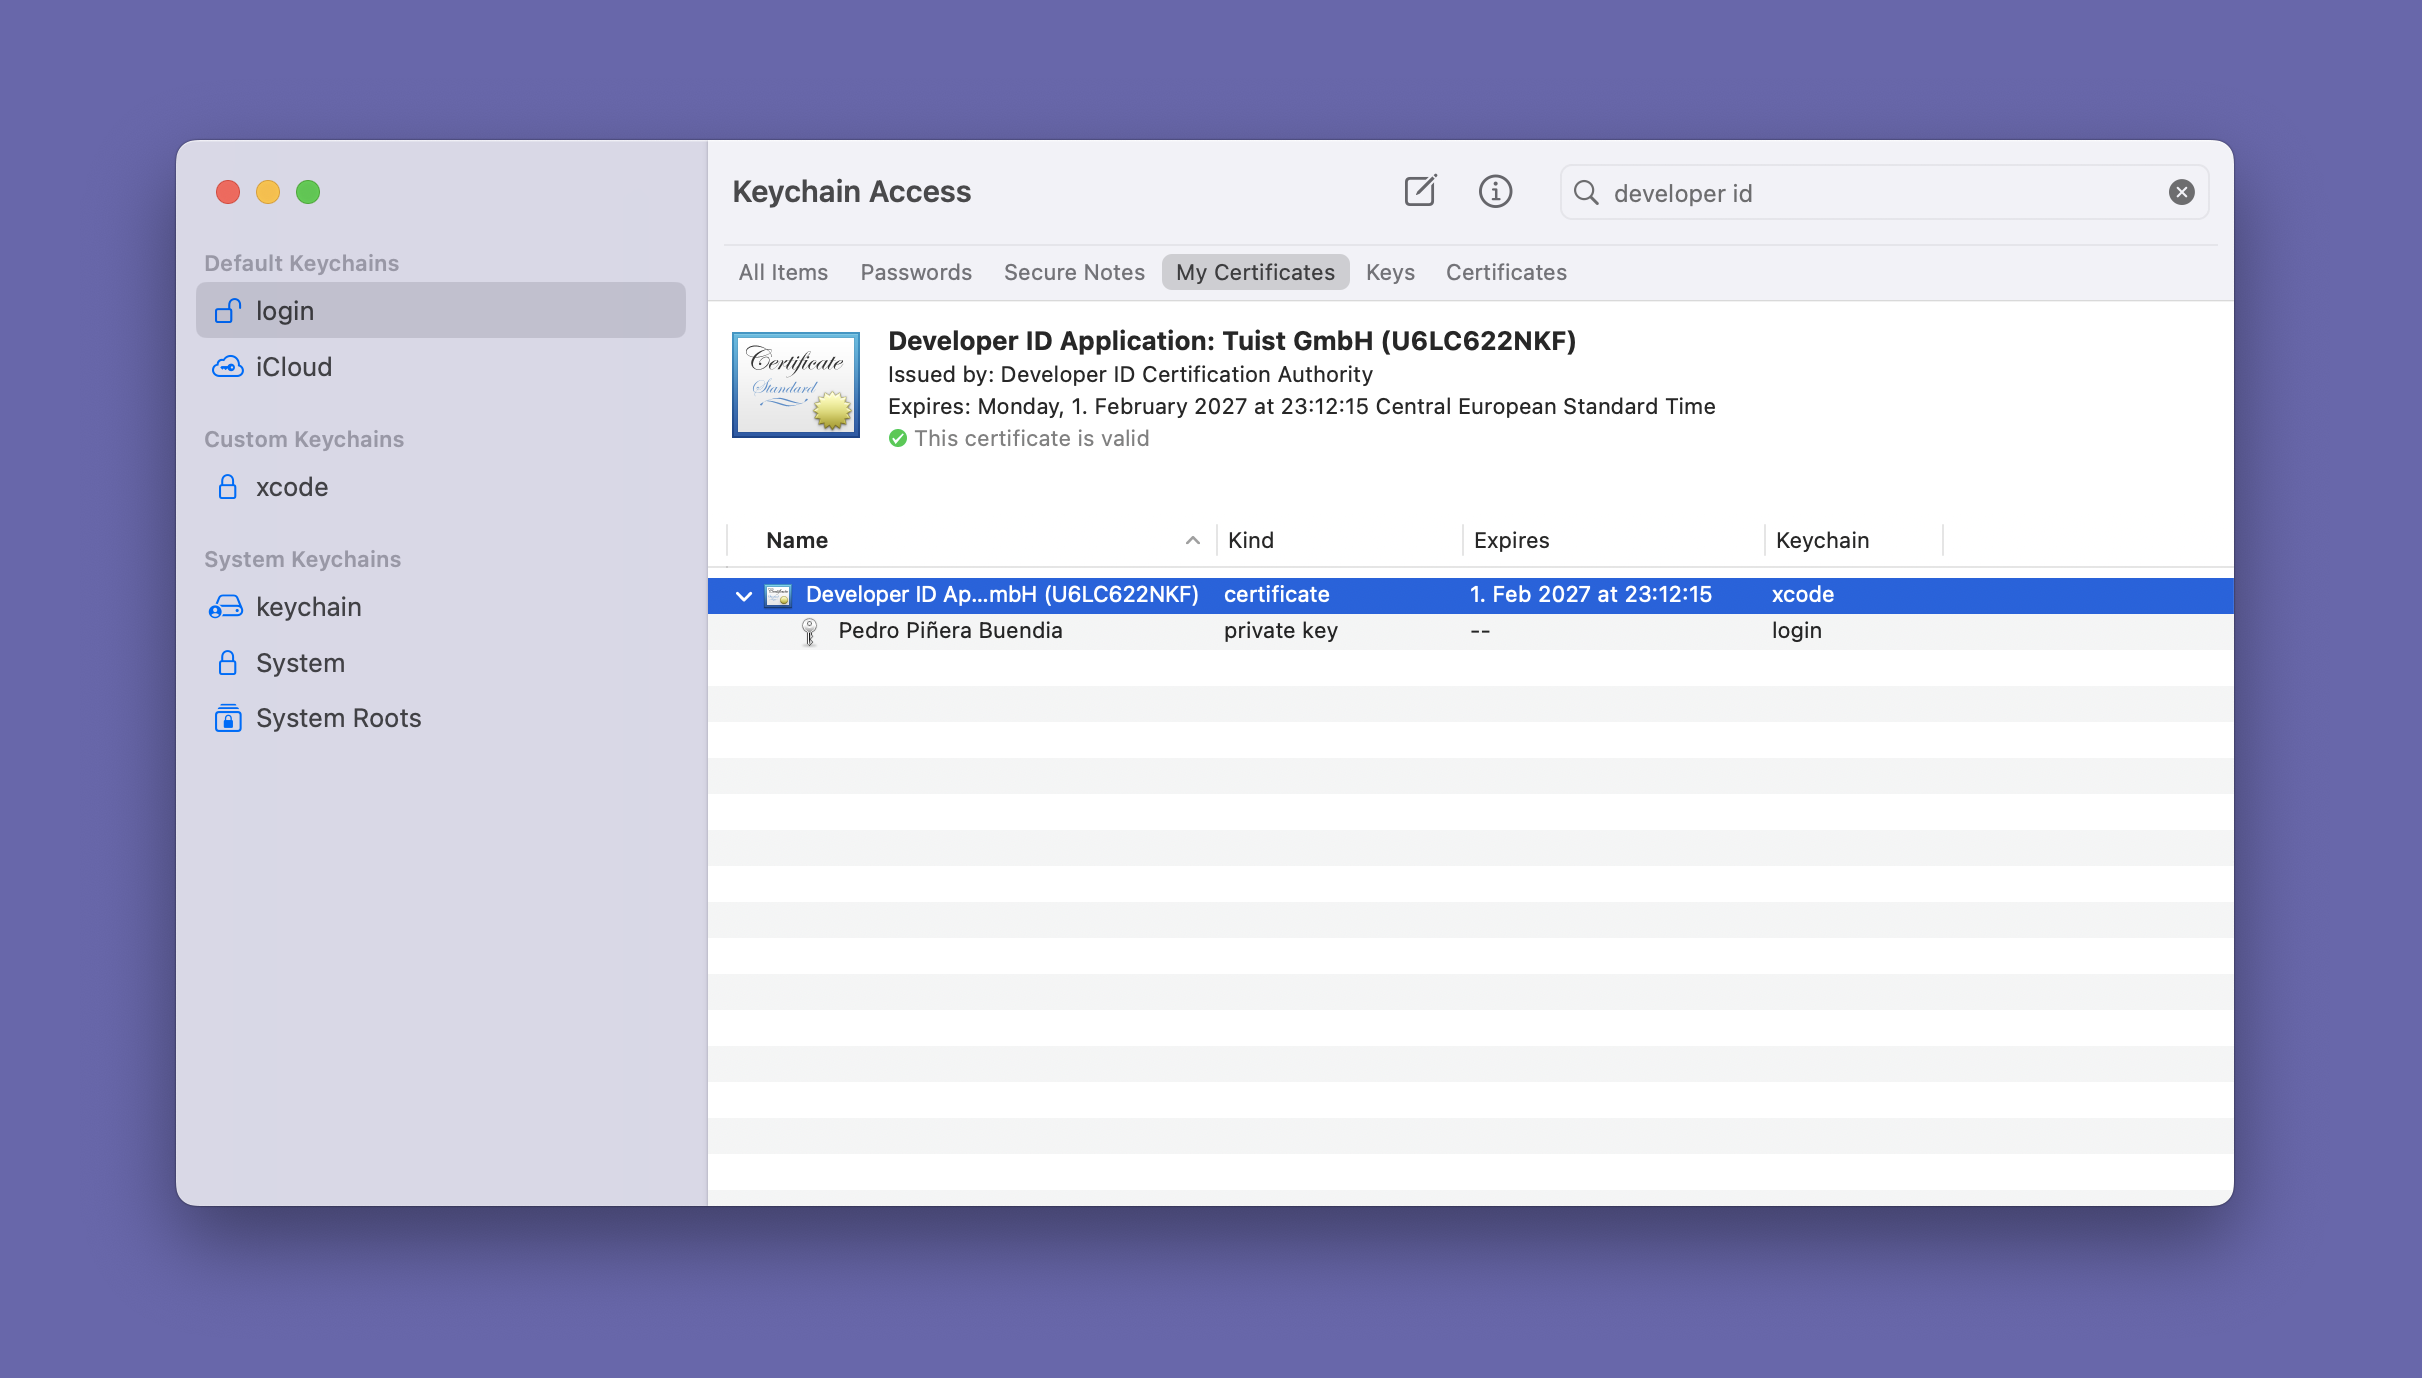
The first step is to create a 'Developer ID Application' certificate. You can head to the the certificates page and click on the 'Create a Certificate' button. Check the 'Developer ID Application' option and click on the 'Continue' button. To proceed, you'll need to generate a certificate signing request (CSR) and upload it. Once you've done that, you'll be able to download the certificate and install it in your local keychain by double-clicking on it.
Select the filtering option 'My Certificates' to ensure for each certificate you see the private key associated with it in a dropdown menu (screenshot below).

Sign the CLI
Once you have the pair of certificates, you can sign your CLI with the following command. $CERTIFICATE_NAME is the name of the certificate you want to use to sign your CLI, which you can find in the keychain:
Notarize the CLI
To notarize your CLI, you'll first need to zip the CLI binary:
And then upload it to the notarization service through their API:
Once the submission is accepted, your CLI should be ready to be distributed to the users.
Apple's documentation recommends to staple the notarization ticket to the binary. However, this doesn't work with standalone binaries, but since it's not mandatory, you can skip it.
Signing from non-interactive environments (CI)
Signing from a local environment is the easy part. However, when signing from a CI environment, there are a few things that you need to take into account to ensure that the signing process is successful. Many organizations and developers prefer to use Fastlane Match, which abstracts those intricacies away. But it's not as intricate as people think, so we are going to share how you can do it with a bash script.
Exporting the certificate and private key
To sign from other environments, you'll have to export the certificate and the private key that you generated. It's crucial that you export the private key as well since it's required to sign the CLI. It's something that's easy to do wrong, so make sure when exporting that you've selected 'My Certificates' in the keychain, and for each entry, you can see both the certificate and the private key. Then right-click on the certificate and export it as a .p12 file.
We recommend setting a password for the .p12 file to add an extra layer of security. Store the password in a secure place, and make sure that the CI environment has access to it.
You can then turn it into base64 to expose it as an environment variable in the CI environment (e.g. BASE_64_CERTIFICATE). Alternatively, you can keep it encrypted in the repository and decrypt it in the CI environment:
Setting up the signing environment
In CI, you'll need to create a temporary keychain, set it as the default, and unlock it. Otherwise, the use of the system or login keychain, if it exists in remote environments, will most likely fail. Then, we base64-decode the certificate (and its key) and import it into the keychain:
Conclusion
By following the steps outlined in this guide, you can ensure that your CLI is properly signed and notarized for macOS. This not only helps in preventing security warnings but also builds trust with your users by ensuring that your software is from a verified source. Remember to regularly update your certificates and keep your signing and notarization processes up to date with Apple's guidelines to maintain a smooth user experience.

